

Contact page design: best practices and examples
Apr 10, 2024
Sometimes you want to host content on your website that is specifically for an individual client. Here's a quick and easy way to achieve this with plugins, if you don’t have the time or resources to develop a customised solution.
We wanted a solution that would give individual clients specific pages, dedicated to them, and a user-friendly experience that didn't feel disruptive.
Lots of methods exist for doing something similar to what we wanted, but they all differed in one of two ways; they either gave all clients access to the same, shared area and/or required disruptive redirection to the WordPress login page.
Here's how we solved that problem.
A private, client-specific page is a page that is not only visible only when a user is logged in, but one that is only visible to a specific client or clients. This type of page may be used to host client specific information or downloads.
In this post we cover a pretty straightforward way to achieve this using standard WordPress user accounts and a couple of freely available plugins. Be advised, not all plugins are compatible with each other, with all themes or with all versions of WordPress so, before committing to this course of action, test to ensure you don’t have any disastrous conflicts appearing as a result.

On to the solution.
This solution calls for each specific client to be a user in your WordPress platform - therefore, to complete this process, your clients' user accounts will need to be created. Give them subscriber rights and allocate a temporary password that they can replace with something secure later on. It's up to you if you let WordPress email them the password now - we prefer to wait until everything is set up so that we can send it together with instructions.
The first step to creating your private pages is to create pages that only specific users can see. For this, we use the User Specific Content plugin. User Specific Content is a great plugin that smoothly allows you to specify individual or groups of users, by role or user name, and gives them access to specific content. The default configuration is that your content is open to all, so don’t worry about it bricking your site while you undo a load of wrong defaults - not needed.
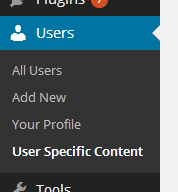
Installing the plugin adds a dedicated settings menu to the Users menu of WordPress and an option, or meta, box to every page and post.
First check the settings. Here you can configure some useful options such as:
Next, create a page that you want only certain users to see. Do all the usual WordPress stuff like naming, picking a parent and template etc. You'll want to pick a page template that allows for a specific, custom sidebar.
Then scroll down to the User Specific Content meta box.

The meta box is where we will set individual settings for this specific page. The right settings for you may differ from those suggested here but our objective is to create a page that can only be seen by specific, logged-in clients.
In the meta box:
Publish the page and you are ready to move on.
Update: WP Modal Login is no longer available in the WordPress plugin directory. I imagine that the same results as described below can be achieved with either Ultimate AJAX Login or SimpleModal Login but we have not had time to test these yet. Where we are using WP Modal Login, it is still functioning perfectly well.
When you distribute the URL to a private page, unless the user is logged in, they are not going to be able to see the content. Instead, they will get the content blocked message. We don’t really like the idea of our users having to type '/wp-admin' to login, or the idea of linking directly to '/wp-admin', as it would be really disruptive to the user experience.
To work around this we use the WP Modal Login plugin. This plugin allows you to easily create and show a pop-up login dialogue using a range of triggers including a shortcode - we will use the widget method however.
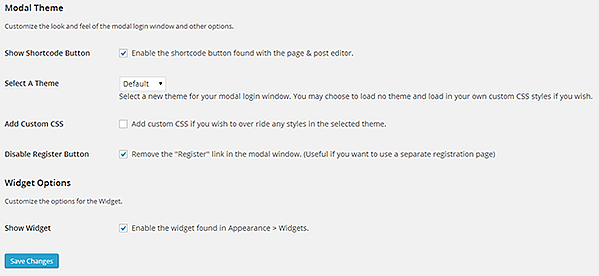
In the WP Modal Login settings (under settings in WordPress) you can select the basic theme you want to use and configure some other settings. For our solution we go for:
Now navigate to your WordPress > Appearance > Widgets page to configure the sidebar for your private pages.
Again you have a lot of freedom here, and how you go about creating custom sidebars will differ from site to site. However it works, you need to create a sidebar for private pages and add the WP Modal Login widget to it.
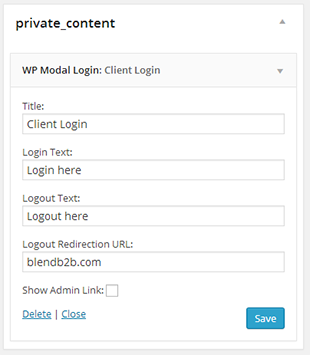
In the widget settings you are going to want to set the copy that appears in several places, a redirection URL for users logging out and, in this scenario, disable the admin link.
Feel free to top and tail this sidebar with other widgets - for example, you can use a Text widget to add even more useful info.

Log out of WordPress and navigate to your private URL. You should see the content blocked message and a sidebar with a login link. Click login and WP Modal Login will throw up a pop-up login window looking something like the one shown here. Enter your admin details or the temporary ones of your client and hit the login button.
After a few seconds, if your credentials are correct, the login pop-up should disappear and you should be able to see the private content. In the sidebar, the login text should have changed to some variation of 'Logout'.
Once you are satisfied that everything is working, make sure all your pages are published and settings saved. Now you can email your customers links to their private content and furnish them with the login details. Don't forget to download our guide to 20 website lead generation essentials so that you can create even more customers that need private pages on your website.
• Ohad Raz of Bainternet for the User Specific content plugin
• Cole Gessinger for WP Modal login
It's true that WP Modal Login is no longer being developed and this may be an issue for some of you. At the time of writing, it seems to be very stable, even on the latest releases of WordPress. We feel comfortable using it for the time being but feel free to swap it out for something else if you prefer.